Submitted by Christy Zutautas

This beautiful gift can be made for $2.50 to $12.00 depending on the type of frame you choose and how you decide to finish it. This is a wonderful gift because it looks expensive and can be given for a variety of occasions, such as birthdays, mother’s day, baby showers, weddings, graduation, and Christmas, just to name a few.
* * *
I have made framed pictures for friends, neighbors, family, and teacher’s, and have received fantastic responses. I have decorated my home with a variety of pictures and sayings, at a fraction of what it would have cost me to purchase a similar item in the store. Best of all my children cherish the ones I've made especially for them. Whether you are looking for the ideal gift, or to decorate your house on a budget, making your own personalized framed picture is the perfect answer.
Items needed:
A picture frame with glass included
Cardstock paper (or thick paper)
Pencil and scissors
Picture, drawing, or poem
Small amount of tape
Access to a computer and printer (optional)
Glue (optional)
Paint, stain, paint brush, glitter, buttons, or other accessories (optional)
Newspaper (optional)
Instructions:
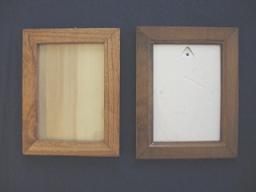
Step 1) Purchase a frame.
Find a frame within your budget. It doesn’t have to be new, it just has be in good condition and look new. I find frames for 50 cents to a dollar at garage sales, and dollar stores. You can find frames at great prices at thrift and bargain stores.
Step 2) Dress it up. (This step is optional)
If it’s within your budget then decorate your frame. There are many low cost ways to do this.
Before you start – Make sure you remove the glass from your frame. Use newspaper, plastic bags, or an old towel to lay underneath your frame. (This could get messy.)
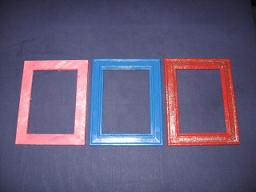
Painting
Paint your frame using craft paint. (Dollar store craft paint is suitable). Using brush on paint does require some skill, you could also try using a sponge or ragging technique to give a textured look for your frame.
For the not so skilled painter, try using spray paint to color your frame. The dollar store variety works fine on this project. Remember to use spray paint outside, or in a safe, ventilated area such as the garage. Follow directions on spray can to ensure great results.
Paint one side at a time, let paint dry thoroughly before you start on the next side. To paint the sides of your frame it may help to lift frame a few inches off of the newspaper. A shoebox or even two upside down coffee cups wrapped in plastic bags (to protect them from paint), will help lift your frame up for easy painting.
Glitter
To add glitter, use regular school glue to cover your frame, pour glitter evenly over glue until well covered, let sit for 1 minute then shake excess glitter off of frame. You can also try using glitter glue, especially for making a design, such as circles, waves, stars, etc.
Accessories
Glue on any lightweight accessories of your choice, such as, small ribbons, buttons, or other small decorations to create a unique frame. You can find everything you need at the dollar store for a fraction of the price you would pay at the craft and hobby stores.
Step 3) Find a picture.
To decide what picture you will use, think about the recipient of the gift, what things do they like? Do you want to give them a seasonal picture, or a picture to match an occasion, such as Christmas or Easter? If it’s a wedding, or housewarming gift you might choose a general picture such as a bouquet of flowers to represent home and love.
You can look for free pictures on the internet, or take one of your own with a digital camera. You could also use a regular photograph from your photo album. A nice idea for a teacher’s gift is having your child draw a special picture for the teacher. You could trace, draw, or make a picture using stencils. Use your imagination to create your unique picture.
If you decide you would rather frame only a saying or poem, without a picture, then skip this step and go to step 4.
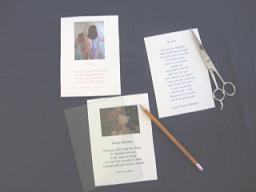
Step 4) Add a saying or poem.
For an extra personal touch add a saying or poem to your picture. This can be done using Microsoft Word or another similar computer program.
You could write something simple like World’s Best Teacher, Merry Christmas, or I’m So Proud Of You, or you could include a longer poem.
If you are not sure what to write perhaps you could read some of the sayings written in greeting cards to get an idea. Perhaps you could tell the person how you feel about them, or what you wish for them, such as…. Wishing You A Life Of Happiness, or ...May God Be With You Always, etc.
Choose different fonts to create the look you want, cursive writing adds elegance, while comic sans is great for a children’s or humorous gift. Combine a picture and saying, or use a picture or saying on its own to create your gift.
Step 5) Size your picture.
If you are working with a digital picture size it to your frame using Microsoft Word, or other similar program. If you are using a photograph that is slightly too small for your frame try using plain or colored paper behind photograph to fill in extra space. Use tape to center picture.
Step 6) Cutting out your picture.
Clean picture frame glass. Any cleaner can be used, for best results apply a tiny amount of dish soap to glass and rinse thoroughly with cold water. Dry completely with soft, clean cloth. Carefully place glass over your picture. Using a pencil trace around edges of glass. Using sharp scissors carefully cut along penciled lines. Once your picture is cut out you are ready for the final step.
Step 7) Fitting Your Picture
Fit picture carefully into frame. If you are having trouble with the picture shifting while you put the glass in, try placing tiny bits of tape on the very edges of your picture to hold it steady while you frame it.
Congratulations, you have created your own work of art!
* * *
Return to Homemade Gift Ideas
Copyright © 2006 by Christy Zutautas. All rights reserved.