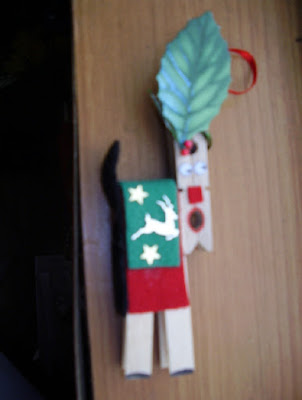
"Clothespeg-Clothespin Reindeer"
I have an easy to make simple Christmas ornament. Even the children can make. You can use scraps from your craft box. So it is very economical. I hope you can get the wooden spring type clothes pegs in America.
Materials needed (for one):
3 flat spring type wooden clothes pegs (OR can use 3 old-fashioned clothes pegs the kind that are flat on two sides)
Two tiny googly eyes (5mm)
Thin red or green ribbon (10cm long)
Red felt, small square cut to fit as a nose between two grooves which are naturally in the pegs
Square of red felt, for nose
Strip of red felt for bottom coat width of the two pegs forming the body
Strip of green felt for top coat slightly shorter than red strip
Brown felt pen for marking hooves
Red felt pen for marking mouth
Artificial green holly leaf with two red berries attached. for ears
Glue
Instructions:
BODY
Glue two clothes pegs together, flat sides together. This is the body.
Colour the ends of the clothes pegs brown to make hooves front and back.
Glue the strip of red felt over the top end of the clothes pegs, to make a blanket over the reindeer's back
Glue a shorter green strip over the red felt to make a further cover.
Glue decorative sprinkles (I used gold stars and reindeer ) on top of green coat to make decorative Christmas themed coat.
Glue strip of black felt cut to fit side on of pegs with pointed end up in air to make tail., (glued to cover where the metal spring is.)
HEAD
Glue the red felt square to the flat side of the 3rd clothes peg, at the top edge of the rounded end, to make the nose.
Glue the googly eyes about a centimeter above the nose (use your own judgment on where the eyes look best).
Use the red felt pen to outline around the hole where the peg clasps together in the closed position to make the mouth.
Use the wire on the holly to tie the holly leaf and berries to the hole where you squeeze the sides of the peg together to open it when pegging clothes on the clothes line. (This makes the ears and antlers, and completes the Christmas theme.)
Use the green ribbon tie around the green metal tie that you have attached the holly to the peg so you have a hanging ribbon to hang up.
Glue the head to the body, half way up the other two to make the head.
The ends should be pointed in opposite directions, with the 'body' of the clothespegs overlapping (this way, the legs point down, the antlers point up, and the head is attached to the body).
If in a stable position the reindeer will stand up by itself.
Also it can hang from the Christmas tree or anywhere else.
It can be used as table place card holder.
Or on a cord or ribbon to hold Christmas cards.
(Here are photos of the back and side views...)
Frugal Living Index
Copyright © 2008 by Rita Black. All rights reserved.


