Submitted by Tammy Schwandt and Emma (6), Aerin (4) and Brooke (2) and Dad helped by cheering!
"Canning Lid Snow Kid"
I like to create new things from old things and lots of times from items headed for the trash at work or at home, so making something that anyone could find universal parts for was my goal.
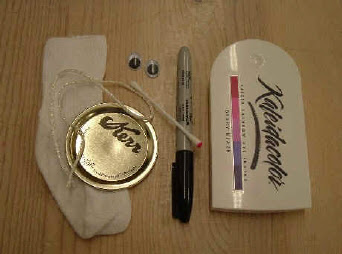
Items needed:
Used canning jar lid (these normally can't be re-canned and so it saves them from the trash) Note: a frozen juice lid would work just as well
Clean kid-sized sock, any color (great to reuse those outgrown, worn through, or mismates)
String or ribbon, 6" - 10" in length (color to coordinate with sock color)
Wiggly eyes, or simply draw your own
Permanent black marker
Spray paint or other paint for metal (color optional - white, cream, flesh-tone...)
Red or Pink stamping ink
Cotton swab
Hot glue gun, or super glue, or school glue and patience to allow dry time. ;o
Directions:
Step 1: Wash a used canning jar lid. Allow to dry well.
Step 2: Paint top side of lid white, or cream or even flesh-tone. Allow to dry well.
Step 3: Lay out piece of ribbon or string. Place sock on top of string, line string up with cuff of sock ribbing. (see photo #3, solid line 1). Tie the string in a tight double knot. Decide if you would like to use loose ends of string as an ornament hanger. If so, tie them off to form the hanging loop. If not used for hanging you could cut the loose ends off or tie in a bow and attach a magnet to the back for your fridge or other metal surface.
Step 4: Cut off foot part of sock to complete hat "pom-pom" (see photo #3, dotted line 2). Fold ribbed edge to form the bottom of hat.
Step 5: Glue on wiggly eyes or draw on your own adorable eyes. Place them right about in the center of the lid.
Step 6: Draw on mouth with marker.
Step 7: Poke cotton swab tip onto ink pad and then dot, or "stipple" on rosy cheeks. If you don't like the placement at first you can quickly wipe them off and try again!
Step 8: Fit hat onto lid head and glue into place. Not a lot of glue is needed, just enough to secure the hat in the back or on the sides and maybe to keep the hat fold from slipping.
Step 9: On remaining foot portion of sock; cut to create the scarf (see photo #3, dotted lines 3 & 4). After cutting you will have a loop. Cut one side of the loop and pull at each end to stretch the strip of fabric. The edges of the strip will curl. Tie the strip into a loose knot and glue the knot to the bottom of the lid. You could also use a torn strip of plaid or printed fabric to dress up your snow kid with some color!
Step 10: You did it! Congratulations on the newest addition to your family!
Other Variations:
Attach a heart and present as a valentine.
Make one as a tree ornament for each member of your family. Name and date each on the back.
Make as a gift tag. Name of the recipient and the giver on the back.
Make 25 different snow kids and attach velcro to the back of each. Stick them onto a felt board or other homemade gridded chart to count the days 'till Christmas!
Return to 1st Annual Homemade Christmas Ornament Contest
Frugal Living Index
Copyright © 2007 by Tammy Schwandt. All rights reserved.
Can't find the page you're looking for?
Free Membership and Ebook Bonus Gifts:
Sign up today and receive 2 ebooks (Dealing with Debt and 101 Coupon Tips) with your Free Membership. The Ebook gifts will be included in your Welcome letter! :o)
"It's not about being able to spend more money.
It's about enjoying and managing what you already have... BETTER!"
- Michelle Jones, Founder of BetterBudgeting
Living a Better Life® is a registered trademark and Better Budgeting a trademark of BetterBudgeting.org, and it's parent company, Blue Ridge Publishing Atlanta, Georgia.
Follow Us:


